This article will guide you through your first steps with Culmas, and will end up with you posting your first product! Along the way, we will be linking to more in-depth articles about the subjects we are discussing, so if you find that you need more information, you will always have a place to go. Remember to write to [email protected] if you have any issues or questions.
Here is what we will be going through today:
1. Creating a Venue
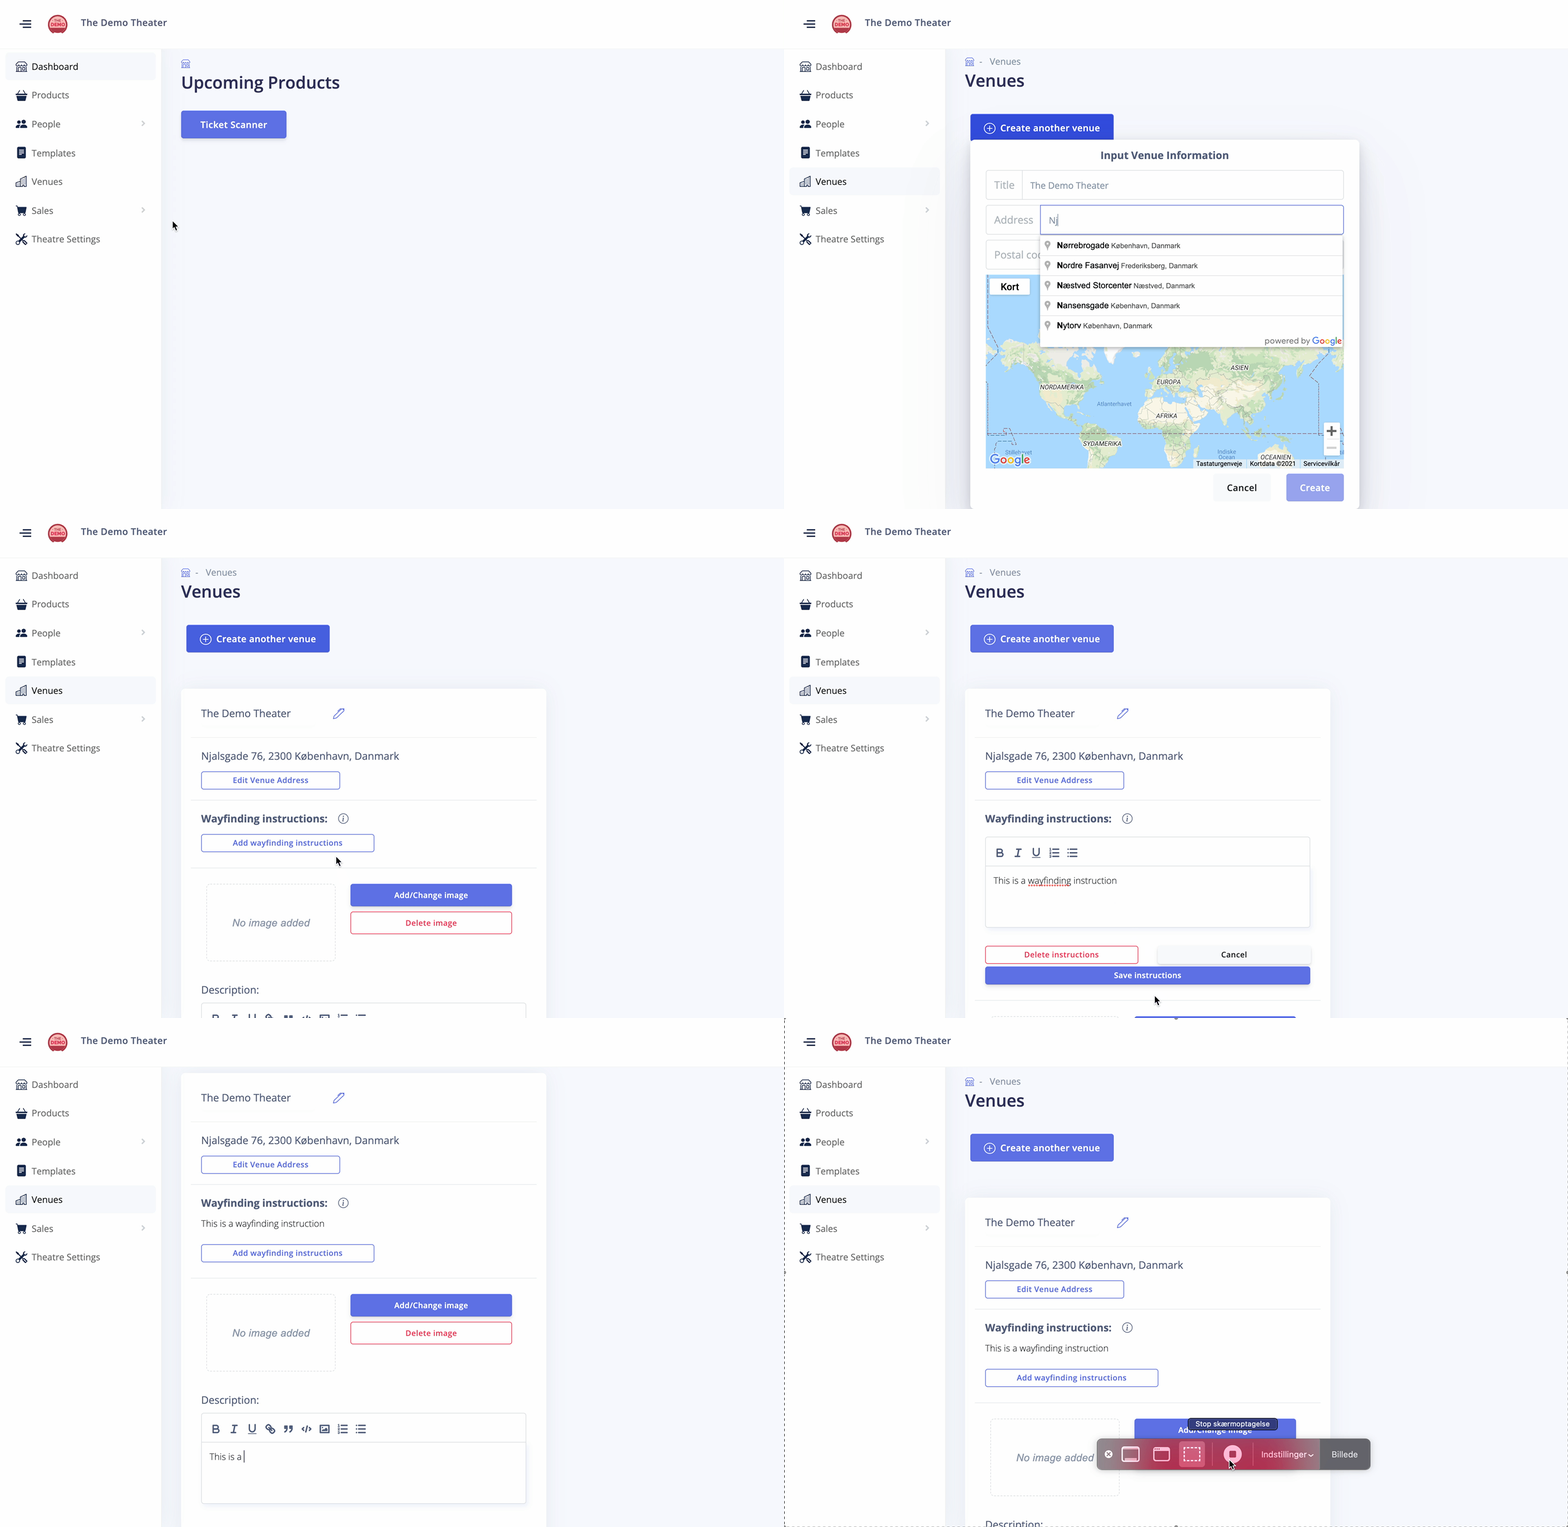
Creating a Venue is very simple - navigate to the Venues in the sidebar, and click "Create New Venue". First, you have to fill out the fields with basic information - name of the venue and the address. Once this is completed, the venue will show up on the list, where you can fill out the rest of the information, such as Wayfinding Instructions.
2. Creating a Template
Read more about Collections and Templates
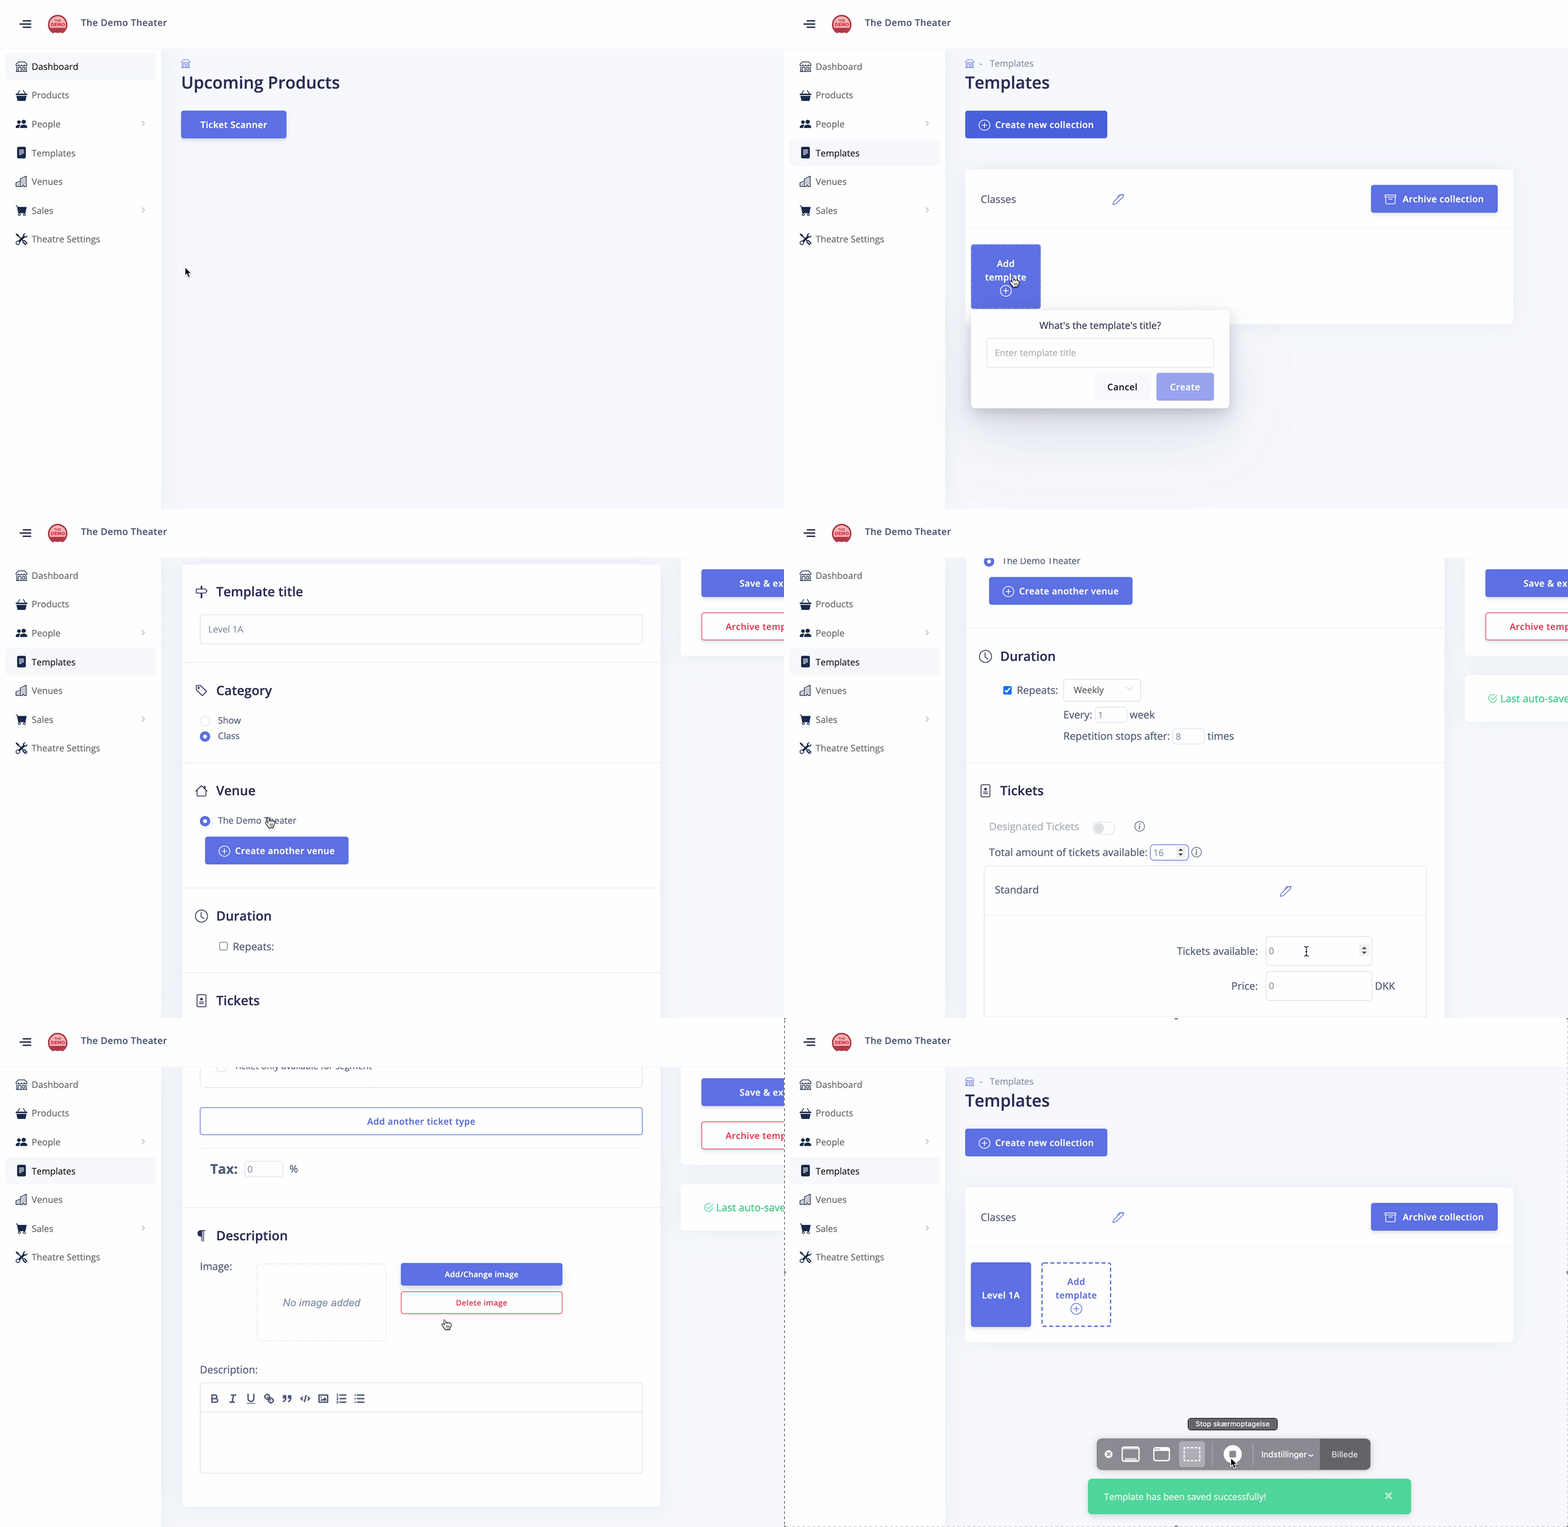
Templates are very useful for creating multiple similar products. First, you must create a Collection. Once this is done, you can create a Template in that Collection. Creating a Template is very similar to creating a Show or a Class, except you do not actually schedule the time. This is done when you import the Template while creating a Show or a Class.
Fill out the information on the page, and reflect on how you can make use of Templates within your theater. You can add as many Ticket Types as you want, which can help diversify your ticket offerings.
For now, create two Collections, one for Shows and one for Classes, with a Template in each. We will use these Templates to create your first Show and Class. One important thing for Collections and Templates used for Classes, is that they will show up on the Storefront - keep that in mind!
3. Creating a Show
Read more about Shows
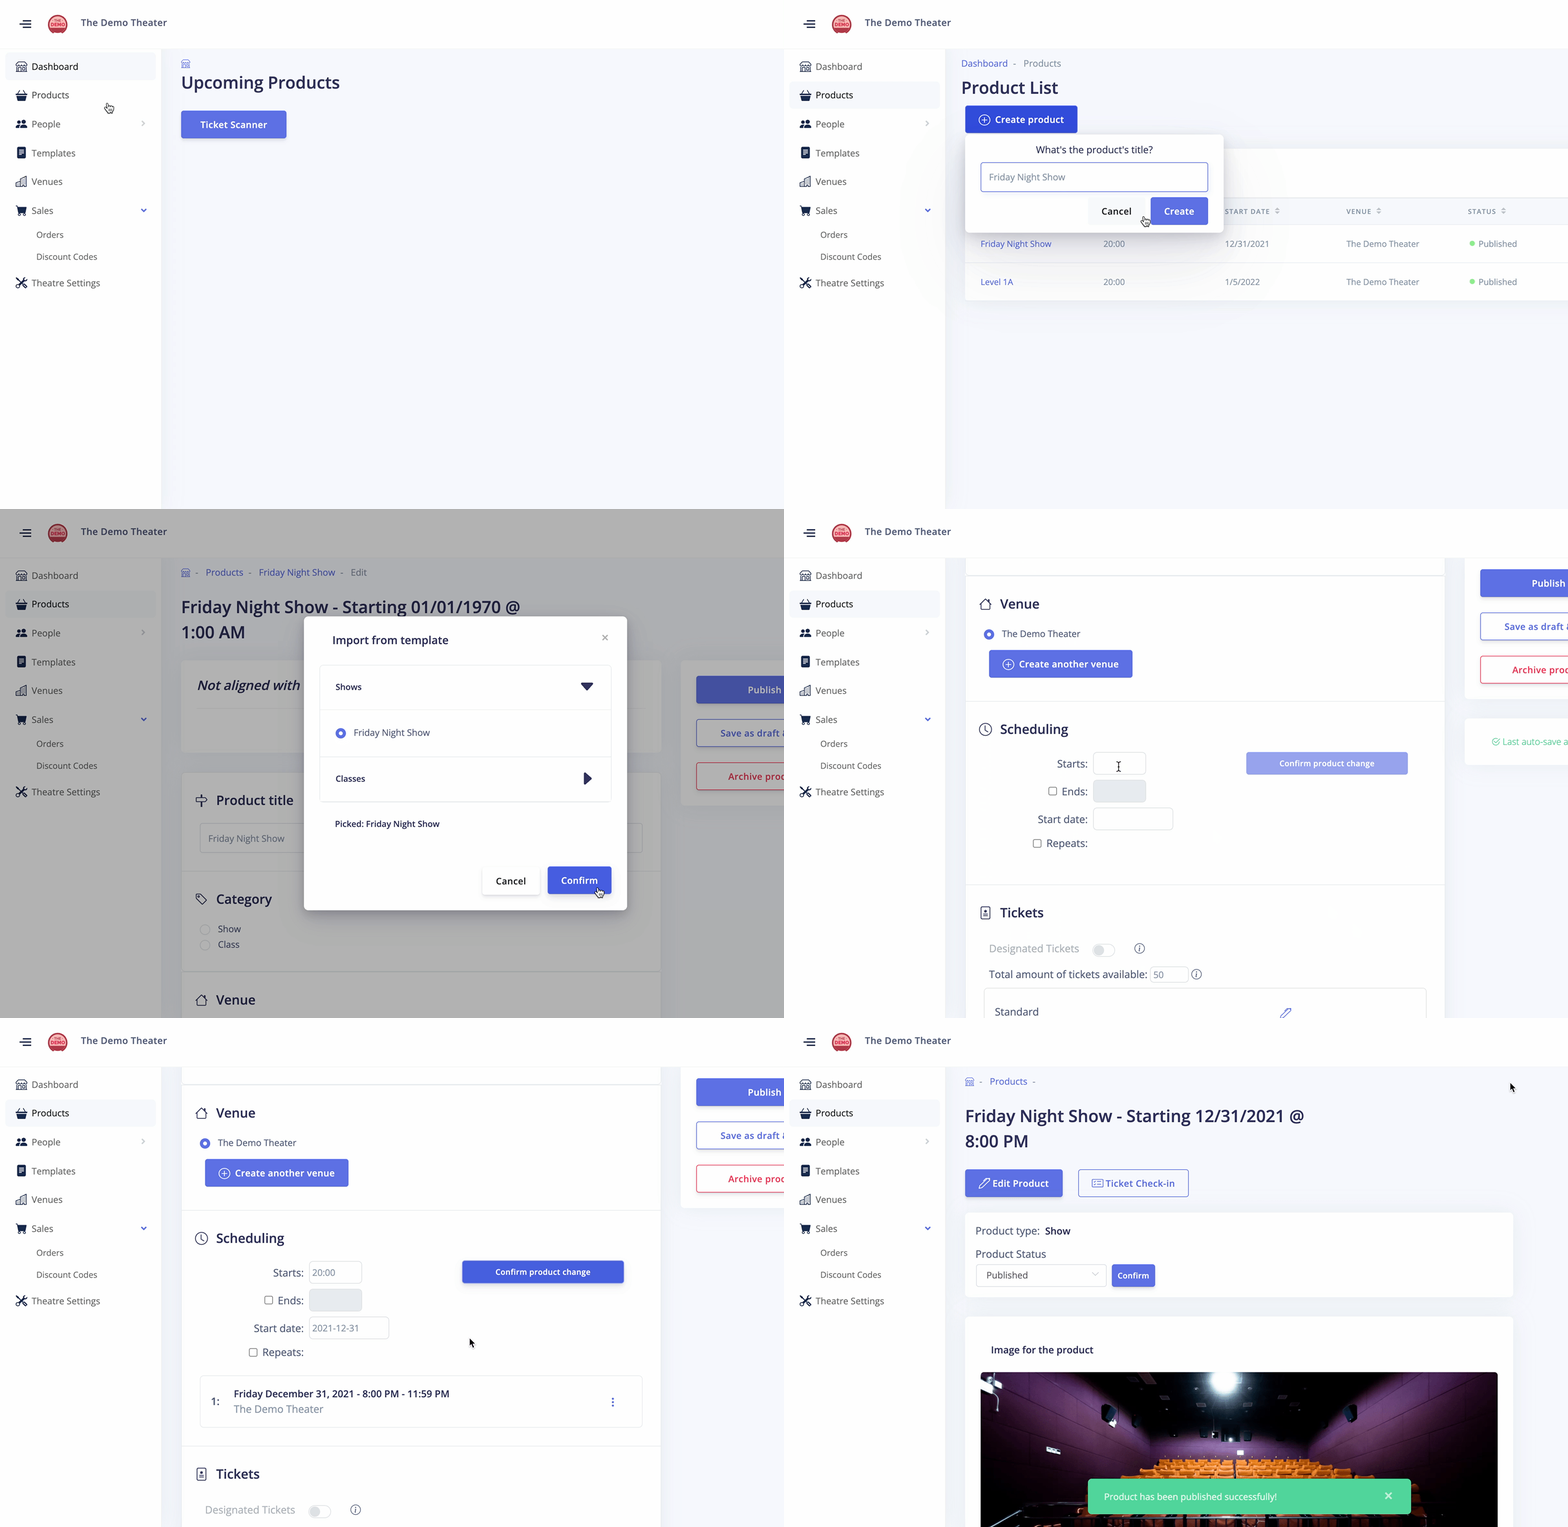
Now that we have a Collection and Template for Shows, we are ready to create one!
Simply navigate to the product page as shown above, and click Create Product. From here, you can either choose to create a product from scratch, or you can use your newly created Show Template to fill out most of the fields for you. You can still change the information you filled out through the Template - it is simply a way for you to quickly create similar products.
Once you're ready, you can either Save As Draft, and Publish the product at a later date, or Publish straight away.
Congratulations on creating your first Show! If you published it, you can view it on your Storefront at [YourTheaterName].culmas.io/shows
4. Creating a Class
Read more about Classes
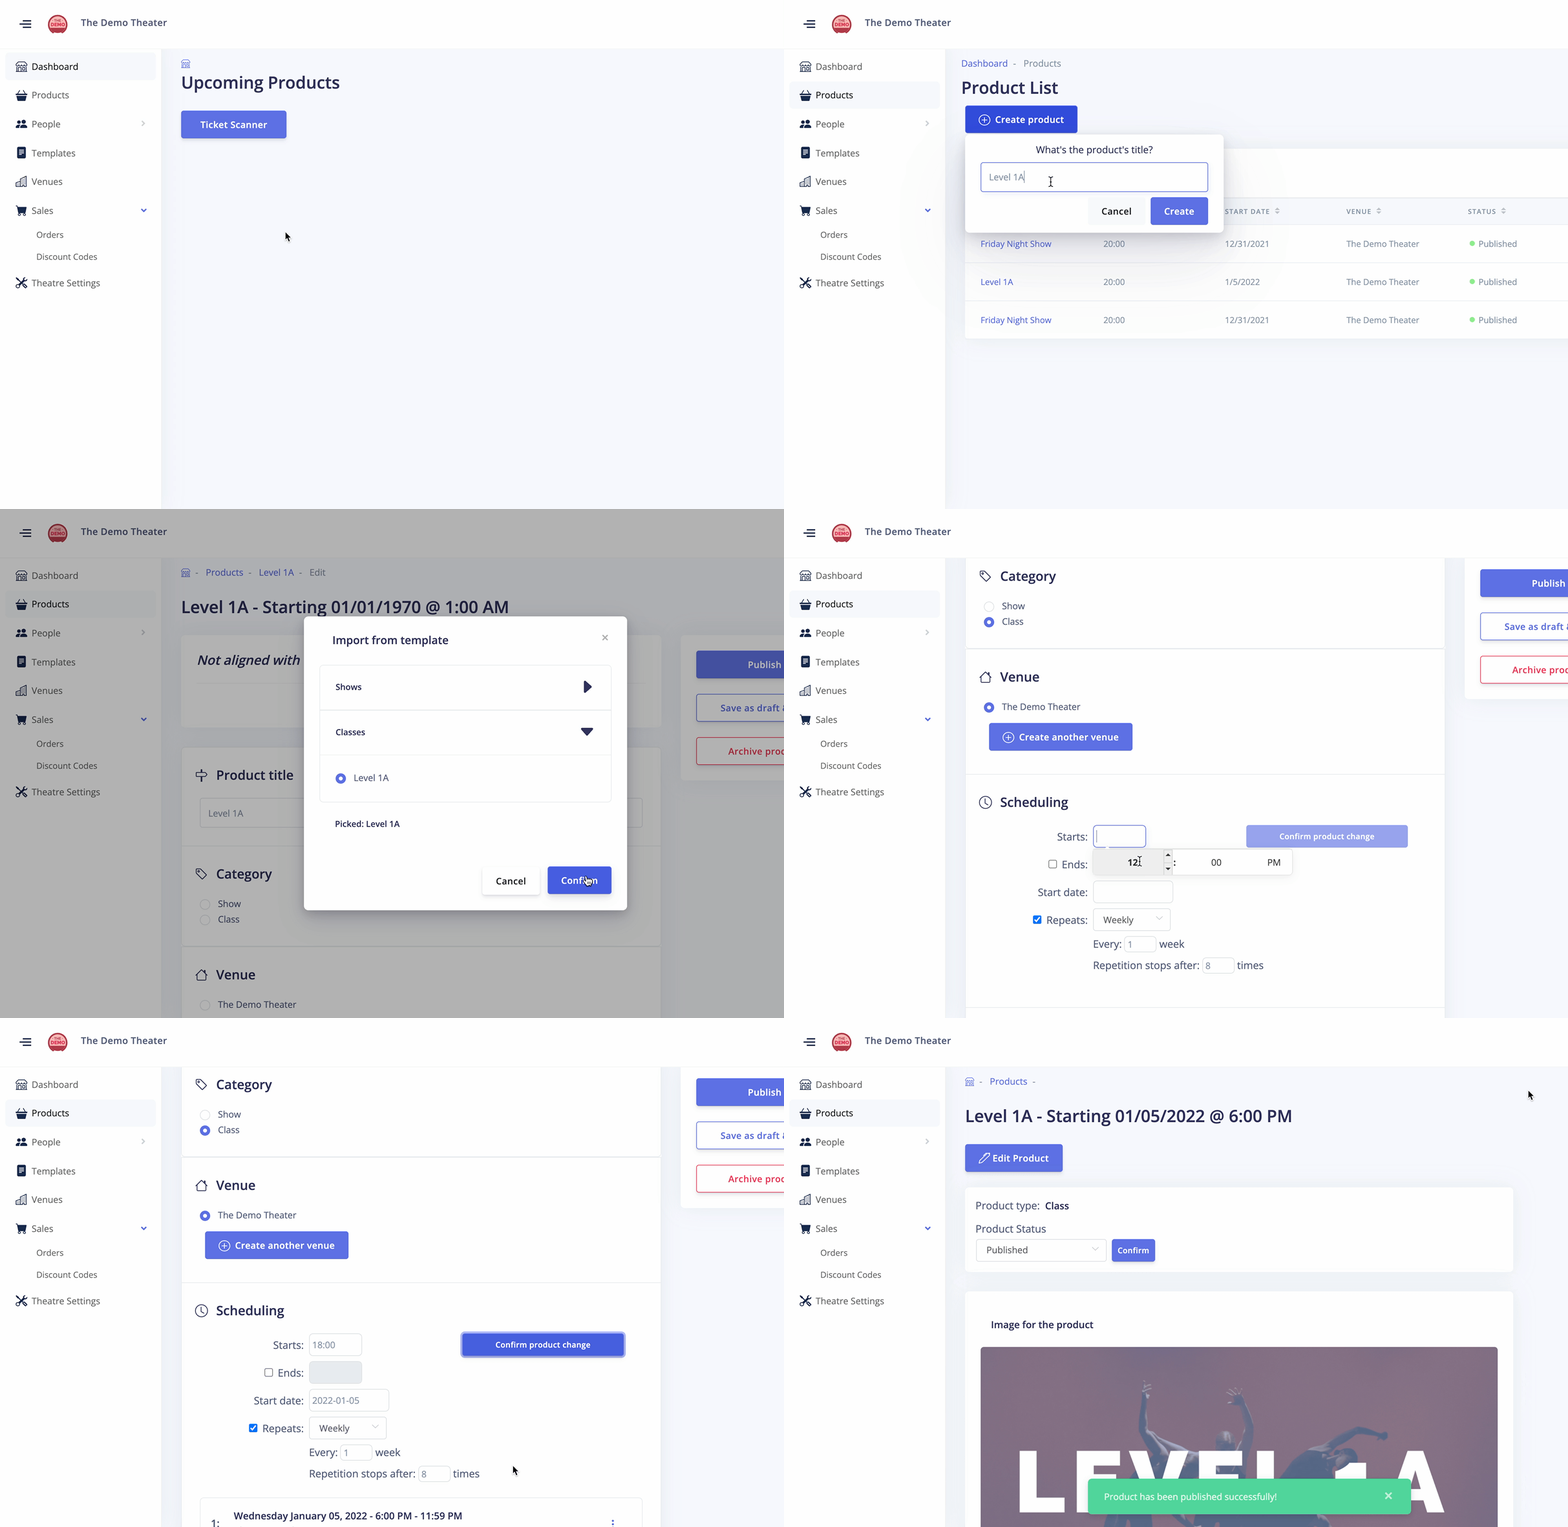
Creating a Class is very similar to creating a Show, with some key differences. You can still add the Template, and the primary thing you have to change is still the Scheduling. Remember to click "Confirm product change", and watch all your Class events show up underneath!
Once you're done, hit Publish or Save as draft.
Congratulations on creating your first Class! If you published it, you can view it on your Storefront at [YourTheaterName].culmas.io/classes
5. Creating a Discount Code
Read more about Discount Codes
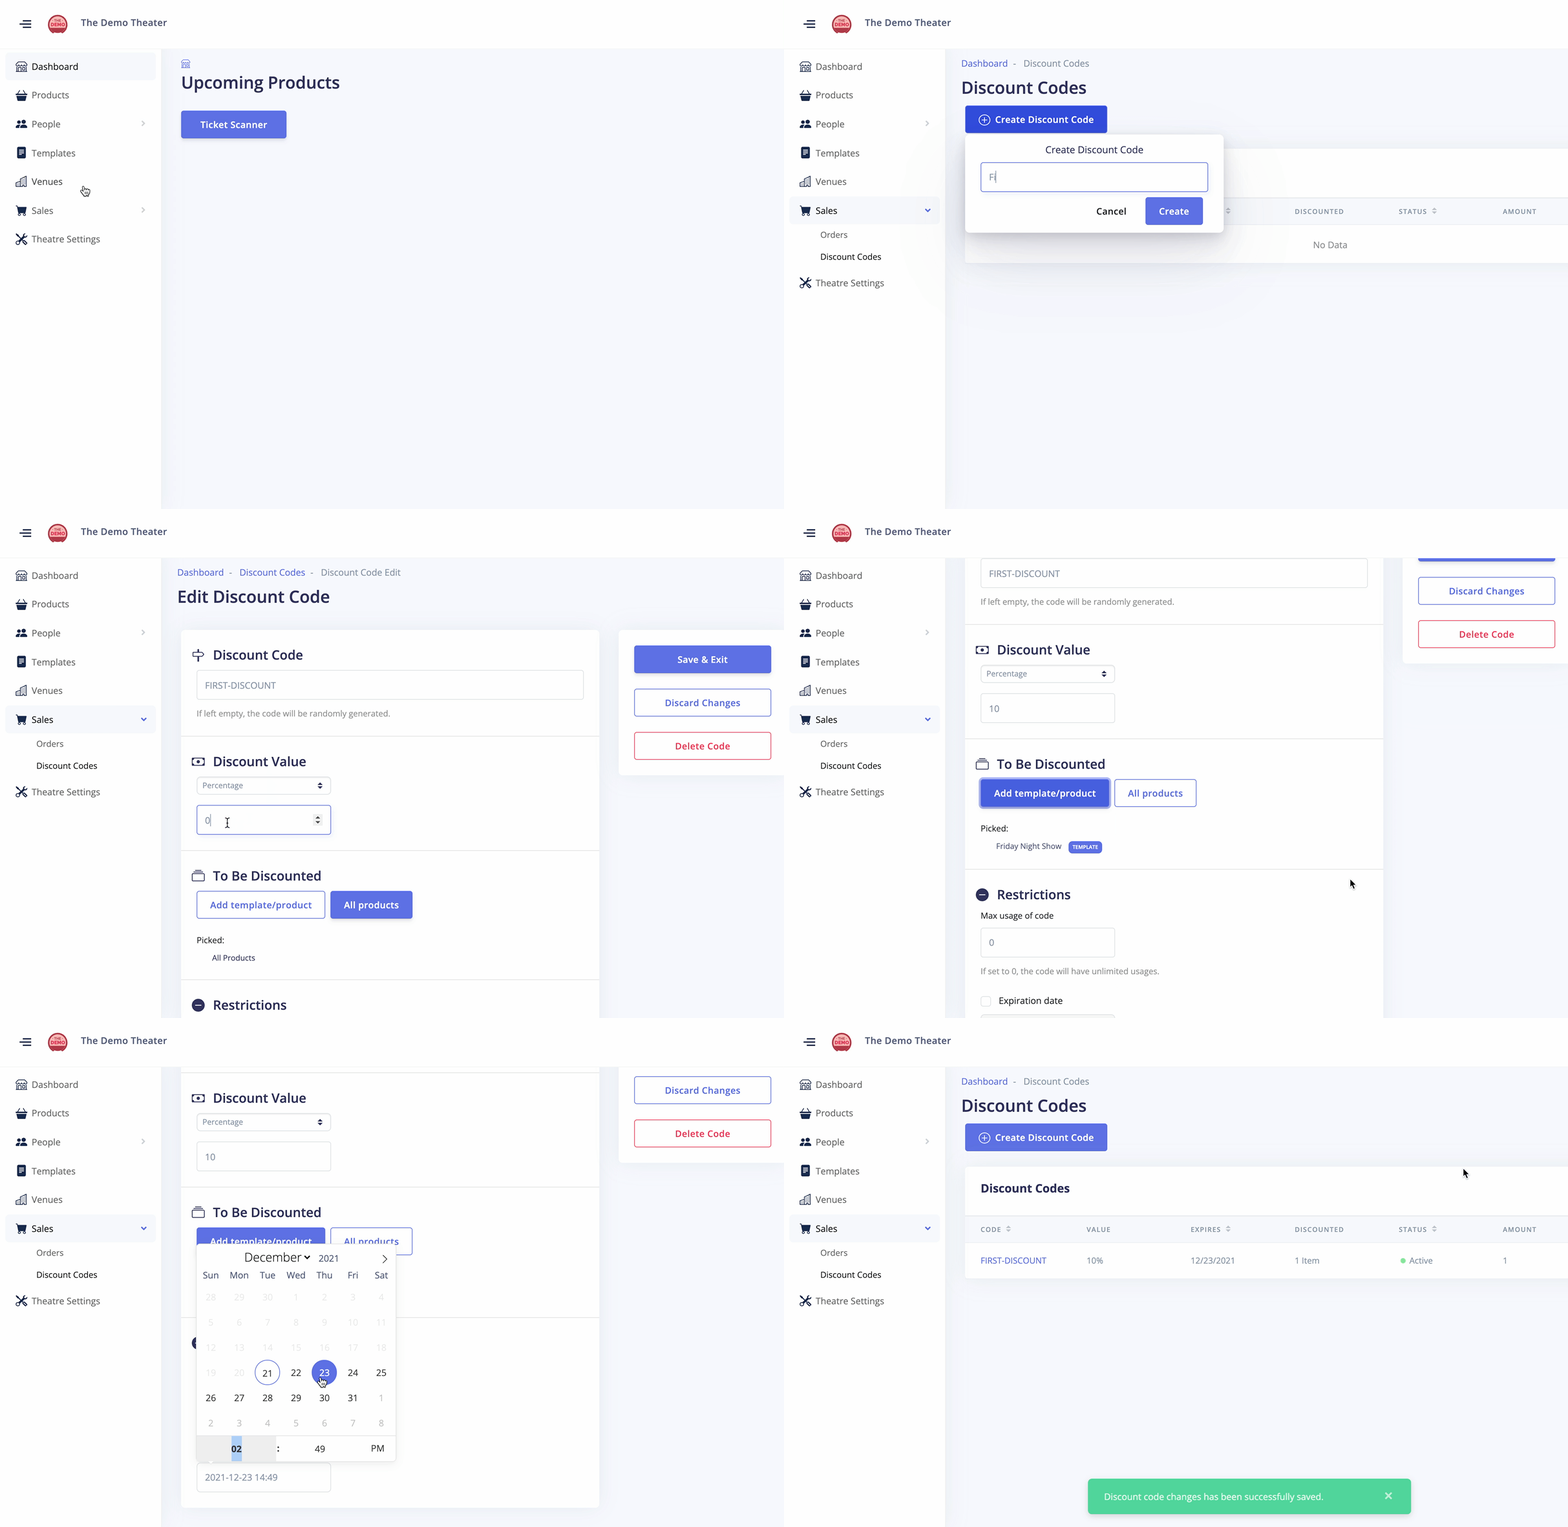
Finally for this guide, we will be creating a Discount Code. Discount Codes are a great marketing tool, and in Culmas it can be used to target specific Collections, Templates and Products. Creating a Discount Code is simple, just navigate to the Discount Codes on the Sidebar, and click Create Discount Code. From here, you can either stick with the autogenerated name, or choose your own. You can choose whether to discount a flat amount, or a percentage. If you want, you can also add a max usage or expiration date.
It is important to note, that our Discount Code system is in its early stages. Currently, a Discount Code will discount all eligible products in a Shopping Cart. For an example, if you have created a Discount Code for all Level 1A classes, i can buy 10 tickets for a Level 1A class and they will all be discounted individually.
We are working on a system to restrict usage further.


Comments
0 comments
Please sign in to leave a comment.